Managing Users
Administrators with the applicable roles associated to their user IDs may manage user profiles for their organizations. Only administrators of organizations can add users to their organizations.
IMPORTANT: To avoid organization ID conflicts, administrators must not create suborganizations below the parent organization. Equally, they must not delete existing organizations.
When you log in as an administrator, the Manage option displays on the XRA menu bar. Its menu list contains options to manage users and role profiles. To learn more about assigning roles to users, see Managing Roles.
You can do the following on the Users pane:
Note: There are usually some default or sample users already set up; however, an administrator can add new users or edit the default ones.
Viewing Users
|
1.
|
Log in as an administrator for the user’s organization. |
|
2.
|
Open the Users pane. Do one of the following: |
- On the XRA menu bar, select Manage > Users.
- On the administrator Home page, click the Manage Users icon.
The page displays three panes, Organizations, Users, and Properties, in which the administrator can select the relevant organization, manage users, and edit their properties, respectively.
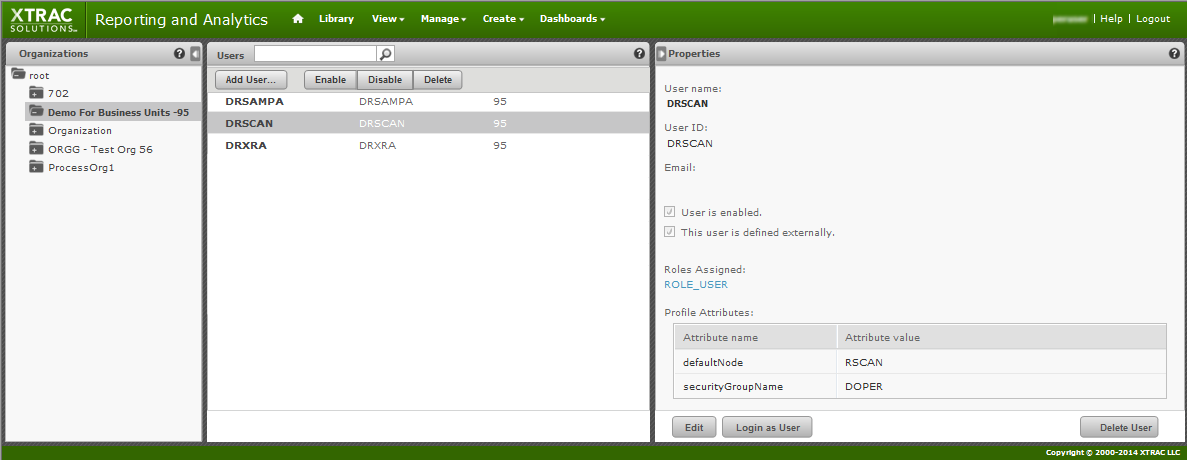
Selecting Organizations
In the Organizations pane, the default root organization displays all the users contained in the selected organization and its suborganizations in the Users pane.
Note: The same user ID may appear several times in the Users pane, indicating that users with the same ID were created in different organizations. The third column in the Users pane displays the organization name of a user.
To select an organization
|
1.
|
In the Organizations pane, expand the root folder by clicking its plus (+) icon. |
|
2.
|
If there are suborganizations, click the relevant folder to display its users in the Users pane. |
Searching for Users
To search for users by organization
- Select an organization in the Organizations pane by clicking its folder's + icon. Each selected folder or organization displays its users in the Users central pane.
To search for users
- Select the organization and enter a search value in the search field above the Users pane. The search results display all users in the selected organization and suborganizations whose user name contains the value.
- To show all the users again, click the "x" icon in the search box.
Managing User Properties
- Select the user in the Users pane. The user’s properties appear in the Properties pane, where you can manage the properties and attributes of users if you have the correct credentials. You can assign multiple roles to a user, or limit the user's access to data. See Managing User Properties.
Adding a User
|
1.
|
Log in as an administrator for the relevant organization. |
|
2.
|
Open the Users pane. Do one of the following: |
- On the XRA menu bar, select Manage > Users.
- On the administrator Home page, click the Manage Users icon.
|
3.
|
In the Organizations pane, select the organization to which you want to add a user. |
|
4.
|
In the Users pane, click Add User. |
The Add User dialog box appears.
|
5.
|
Enter the following details: |
- User name (optional but recommended): The name of the person linked to the user account. XRA displays the current user’s name in the top-right-hand corner of the page.
- User ID: When you enter a user name, the same value automatically appears as the user ID. You can accept or change this value. The administrator uses the ID to manage users and the user logs in to XRA with it. The ID must be unique within an organization; however, the same user ID can exist in other organizations.
- Email (optional): The email address of the user.
- Password and Confirm Password (both required): Enter the same password in both fields.
- User is enabled: Select this check box to allow the user to log in. If you need to assign more role-based permissions to the user, you can prevent the user logging in by clearing the check box. For information on assigning and editing roles, see Managing Roles.
|
6.
|
Click Add User to <organization> to create the user. |
The new user appears in the Users pane. The ROLE_USER property has been assigned to the user. To assign other roles, see Managing Role Properties.
Enabling or Disabling Users
Administrators can enable or disable specific users when they add one. However, in the Users pane, they can also disable and prevent users from logging in, and then enable them later on. For example, the administrator may need to lock out all the users when changing XRA's configuration.
Administrators can select single or multiple users to disable within their organizations.
|
1.
|
Log in as an administrator for the relevant organization. |
|
2.
|
Open the Users pane. Do one of the following: |
- On the XRA menu bar, select Manage > Users.
- On the administrator Home page, click the Manage Users icon.
|
3.
|
In the Organizations pane, select the organization in which you want to enable or disable users. |
|
4.
|
In the Users pane, select the users to enable or disable. Use CTRL+click or SHIFT+click to select multiple users. Alternatively, use a search term to find specific users. |
|
5.
|
.On the toolbar, click Enable or Disable. |
Deleting Users
|
1.
|
Log in as an administrator for the relevant organization. |
|
2.
|
Open the Users pane. Do one of the following: |
- On the XRA menu bar, select Manage > Users.
- On the administrator Home page, click the Manage Users icon.
|
3.
|
In the Organizations pane, select the organization in which you want to delete users. |
|
4.
|
In the Users pane, select the users to delete. Use CTRL+click or SHIFT+click to select multiple users. Alternatively use a search term to find specific users |
|
5.
|
On the toolbar, click Delete, and then confirm the deletion. |