Configuring Business Rule Tasks
A business rule can enforce business policy, make a decision, or infer new data from existing data. This type of task includes an "if/then" statement that provides the input to evaluate the rule and receives the result in an output variable. For example, if a customer has excellent credit, then assign a credit rating of 780.
A business rule task is configured with the Business Rule Task Editor. The editor enables you to configure data objects for input and output, set up conditions and take an action such as setting data object values.
To configure business rules
Note: You cannot configure business rules until you have added data inputs to the business rule task.
Add Data Objects to Inputs and Outputs
Data objects are variables that contain values managed from the Data Dictionary.
|
1.
|
Open the Business Rule Task Properties panel. In the properties panel, click the Business Rule Task Properties. |
|
2.
|
Click Inputs and Outputs. |
|
3.
|
Click and drag data objects from the Data Dictionary or from Process Data and drop it on the Inputs and Outputs table. |
For more information, see Configuring Data Inputs.
Add Business Rule Task
A business rule task defines how a business rule is implemented.
|
1.
|
Open the Business Rule Task Configuration dialog using one of the following methods: |
|
2.
|
Right-click a business rule task shape and from the context menu, select Configure Business Rule Task. |
|
3.
|
Open the Business Rule Task Properties panel. In the properties panel, click the Business Rules tab and then click Configure. |
The Business Rule Task Configuration dialog opens and lists the rules that have already been applied to the selected business task rule shape.
|
4.
|
In the Business Rule Task Configuration dialog, click Add. |
The Business Rule Task Editor opens.
|
5.
|
In the Name text box, enter a name for this business rule. |
Note: Rule names are required and must be unique in the context of the current process.
|
6.
|
(Optional) In the Description text box, enter a description of the business rule. |
Add a Condition
Use this editor to add conditions and values for the data outputs associated with the selected business task rule shape. A condition is an expression that XTRAC evaluates before it executes a defined action or set of actions.
|
1.
|
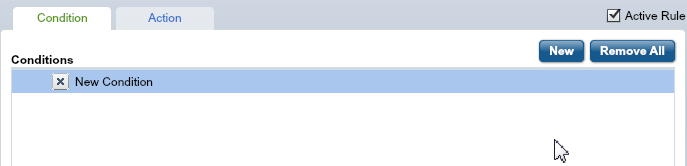
On the Condition tab click New. |
A condition called "New Condition" appears in the Conditions section as shown below.
|
2.
|
In the Condition Details section, click Process Field to select fields that come from the data that has been added to the process, or click System Field to select process system fields (such as CurrentDateTime). |
|
3.
|
From the Field Name drop-down list, select a field name. |
Note: Only the data types that have been added to the process (added to the drawing canvas) are available in the drop-down list when the Process Field option is selected.
|
4.
|
From the Operator drop-down list, select the operator that will act on the selected field name. |
Note: The type of operators available from the drop-down list depend on the type of field selected from the Field Name drop-down list. For example, if you select a system field such as TaskName, the available operators may only be equal to ( = ) and not equal to ( != ) the name of the task.
|
5.
|
In the Value(s) text box, enter a value that you want to use with the selected operator.
The conditions you select are displayed in the Conditions section. |
For example, if the field you select is BadgeID, and the operator you select is > (greater than), a specific action will be taken on all ID badges with a number larger than the value you specify.
Set Action Outputs
The Action tab displays the output fields associated with the data input fields selected in the Condition tab. Use this tab to enter the output values for the associated output fields.
|
2.
|
In the Action tab, click the Edit button next to the output field you want to configure. |
The Value Editor dialog opens. The Value Editor has three options: Literal Value, System Data or Expression.
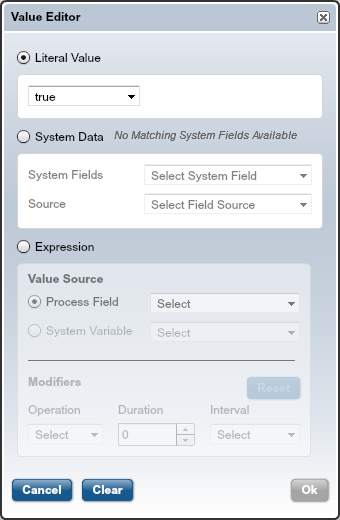
If the value is for a literal text string (such as the name of a city) the Literal Value button is selected by default. If the value is for system data, the System Data button is selected by default. Use the System Fields and Source drop-down lists to select the values. You can also use the Literal Value field with system data to enter a value such as a specific date and time.
|
3.
|
If you want to create your own value expression, click the Expression button (see Create an Expression). |
|
4.
|
Click OK to close the Value Editor. |
|
5.
|
In the Output Value column, enter the values to be used with each output field. |
This field may be populated automatically based on values you entered in the Value Editor.
|
6.
|
To make the rule active, click the Active Rule check box. |
The Business Rule Task Configuration Editor closes and the Business Rule Task Configuration dialog is displayed.
|
8.
|
To close the Business Rule Task Configuration dialog, click Close. |
Create an Expression
An expression is a combination of system variables or process fields according to rules that depend on the context.
|
1.
|
Select Expression radio button. |
|
2.
|
In the Value Source field, select: |
- Process Field. Available fields depend on field names that have been added to the Conditions field in the Business Rule Task Editor.
- System Variable such as Current Date or Current Time.
- The fields in the Modifiers field are enabled. Select the
- Operation ( + or - )
- Duration (a number greater than 0)
- Interval (Days, Weeks, Months, or Years) to modify the selected system variable.
The dialog closes and returns you to the Business Rule Task Editor.
Prioritizing Business Rule Tasks
You can add more than one rule to a business rule task. The Business Rule Task Configuration dialog lists all the rules associated with the selected business rule task. In the dialog, you can set the order in which the rules will be triggered.
To activate and prioritize rules
|
1.
|
On the drawing canvas, select a business task rule. |
|
2.
|
Open the Business Rule Task Properties panel. |
|
3.
|
Click the Business Rules tab. |
The Business Rule Task Configuration dialog is displayed.
|
5.
|
To change the rule priority, select a business rule task and click the Up or Down button to move it to the desired position. |
|
6.
|
To save your changes, click Save. |
|
7.
|
To close the dialog, Close. |


