|
XTRAC Process Designer User Guide |
|

|

Configure User Task SLA Rules
The SLA Rule Editor allows you to set up rules that define the amount of time a user task can be in progress before it is considered to be in jeopardy, or at risk of not being completed within the specified time interval.
The SLA rules you add apply only to the selected user task and not to the overall process. To configure SLA rules for the overall process, see Configuring Process SLA Rules.
Note: Before you can configure an SLA rule, the selected user task must have data inputs and outputs associated with it. For more information, see Configuring Data Inputs and Configuring Data Outputs.
Configure a User Task SLA rule
| 1. | On the drawing canvas, open the User Task SLA Configuration dialog using one of the following methods: |
- On the drawing canvas, right-click a user task shape and select Configure Task SLA.
- With a user task shape selected, open the User Task Properties panel. In the User Task Properties panel, click SLA Rules and then click Configure.
Any SLA rules that have already been configured for the selected user task will be listed in the User Task SLA Configuration dialog.
In the User Task SLA Configuration dialog, you can click Add to create a new SLA rule, click Edit to modify an existing SLA rule, and click Remove to remove existing SLA rules from the list.
| 2. | In the User Task SLA Configuration dialog, click Add. |
The SLA Rule Editor opens. Use this editor to add conditions to the user task rule. A condition is an expression that XTRAC Process evaluates before it executes a defined action or set of actions.
For example, the condition on a background check may reject the application for a loan if the customer has a bad credit rating.
| 3. | In the SLA Rule Editor, type a name for this rule in the Name text box. |
The name is required. You cannot save the rule until it has a name.
| 4. | (Optional) In the Description text box, enter a description. |
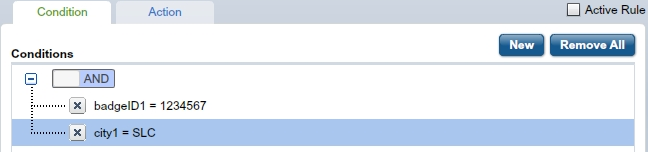
| 5. | On the Condition tab, click New. |
The words New Condition appear in the Conditions field.

| 6. | In the Condition Details section below the Conditions field, select a field from the Field Name drop-down list. |
Note: The data types that have been associated with the process are available in the drop-down list.
| 7. | From the Operator drop-down list, select the operator that will act on the selected field name. |
The operators available from the drop-down list depend on what type of data is selected in the Field Name drop-down list. For example, operators for a date/time field may include equals (=), does not equal (!=), less than (<), and greater than (>).
After an operator is selected, the Value(s) and Expression fields appear on the Condition tab. The Value(s) option lets you enter specific values that work with the operator. For example, if the field you select is BadgeID, and the operator you select is > (greater than), a specific action will be taken on all ID badges with a number larger than the number you specify in the Value(s) text box.
The Expression option lets you create and edit a value expression to be added to the condition.
The conditions you select are displayed in the Conditions field. You can create more conditions to meet your needs, or you can continue with the next step.
Note: If the data type you select in the Name Field is DateTime, the business calendar associated with the work item rule will be available in the values field. This business calendar affects only the selected user task. The business calendar associated with the master work item affects the overall process, but not the selected user task. For more information, see Using Business Calendars.
| 8. | In the SLA Rule Editor, click the Action tab. |
The Action tab is where you can define the user task duration and set the threshold that determines when the task is in jeopardy of not being completed on time.
In the Duration field, you can set the time interval in minutes, hours, and days. You can also select Business Days or Calendar Days. The Business Days option uses the business calendar that is associated with the work item rule you selected to use with this user task. The business calendar restricts the time interval for task completion to defined business days.
For more information, see Using Business Calendars.
| 9. | In the Duration field, use the drop-down lists to define a duration in minutes, hours, and days. |
| 10. | Select whether the duration will use Business Days or Calendar Days. |
Note: The business calendar is the default calendar associated with the work item rule that you associated with the selected user task.
| 11. | In the Threshold field, select Use System Default Threshold Percentage or User Defined Threshold Percentage. |
The threshold defines when the SLA is considered in jeopardy and at risk. The threshold is specified as a percentage of the SLA time interval defined in the Duration field. When the process is executed, the XTRAC Process Manager monitors the status of the process and determines what action needs to be taken based on the duration and the threshold percentages.
| 12. | To activate the rule, click Active Rule. |
If you do not click Active Rule, the rule can still be saved and associated with the selected user task. However, the rule will not have any effect on the user task until it is activated. For more information, see Activating and Prioritizing SLA Rules.
You can configure multiple rules on a user task. The Active Rule check box lets you select which rules are active and which are inactive.
| 13. | Click Save to close the SLA Rule Editor and to return to the User Task SLA Configuration dialog. |
XTRAC Community |

|